Json Web Token (JWT) Authentication. A How to Guide
November 5, 2023
Web API is a common thing to implement these days. It gives flexibility and great separation between presentation and business logic layers.
When we are implementing mobile applications or Single Page Applications (SPA) we will need to use Web API. One of the challenges of implementing Web API is security. This is because it is globally accessible through the internet, and so we will need a way to secure it.

If we are using ASP.NET Core there are a couple ways to secure our Web Api, we can use Identity Server with the Oauth2 protocol and the other is using Json Web Token(JWT) Authentication
Often when we are implementing Web API we just need a simple authentication scheme using username and password, and after the authentication passes, token identification can be used. JWT is an open standard for case like this, the concept is simple and ASP.NET Core has an Identity Model and JWT middleware that will help us to implement this simply and quickly.
In this article, I would like to share my way of implementing JWT Authorization that we are using in one of our projects at 42 Interactive. It’s a SPA Project and we are using Vue.js on the front-end and Web API with ASP.NET Core 2.2 on the back-end so it needs to be secured.
Configure Authentication
After theASP.NET Core Api project has been created we will need to configure our authentication. Firstly, we need to configure some settings in app settings.json that we will use later on.

As a note, when using HmacSha256 the keys encoded length should be more than 128 bits otherwise the token generation will fail. That said, it is recommended to use long complex keys to prevent a potential brute force attack.
Next, we need to setup our authentication by declaring the JWT service to the application pipeline. We do this in the ConfigureServices method of the application startup class (startup.cs).
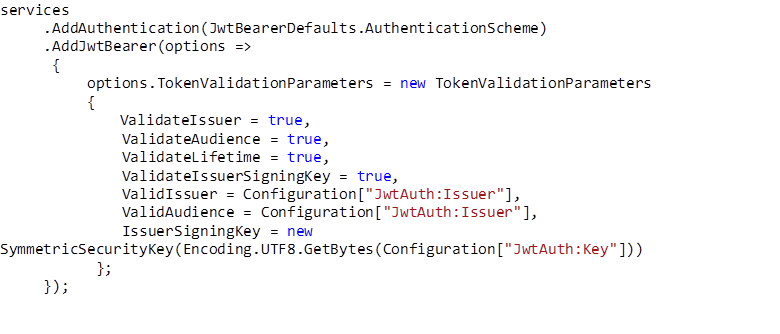
With that piece of code we are saying:
- authorize by default using the JWTscheme,
- we want to validate the Issuer, Audience, Lifetime and Signing key,
- the ValidIssuer is from our config,
- the ValidAudience is from our config, and
- the key is a Symmetric Security Keybase on the value in our config
So every time and authorization validation request is needed the token will be validated basedon the above criteria.
ASP.NETCore has a well known Identity model used as a standard. Facilitating best practise, we also want to use it in our implementation, so we can define the configuration like this:

Since we are using only WebApi we will need AddIdentityCore<TUser> and not AddIdentity<TUser,TRole>. Using the later extended method will cause problems for us because of the extra settings relevant to websites and their routing.
That’s it! We have now added authentication middleware to our application pipeline, next we need to create a mechanism to add users.
New User Registration
In the project, we are using Entity Framework (EF) code first as the database ORM(Object Relational Mapping). I won’t explain much about EF code first, basically we have a DbContext and use it to add a new user to our IdentityDatabase and if you haven’t used this library we highly recommend you look it up.(https://docs.microsoft.com/en-us/ef/ef6/modeling/code-first/workflows/new-database).
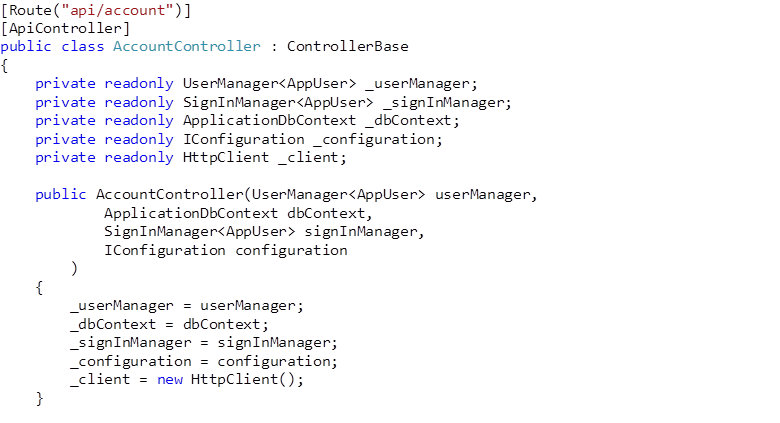
Next we need to create a new controller. Let us call it AccountController, and use someDependency Injection (DI) magic from .Net Core to match objects to our variables via constructor injection:
Now we can create a register method to add a new user to our custom Identity User table and another non-Identity table
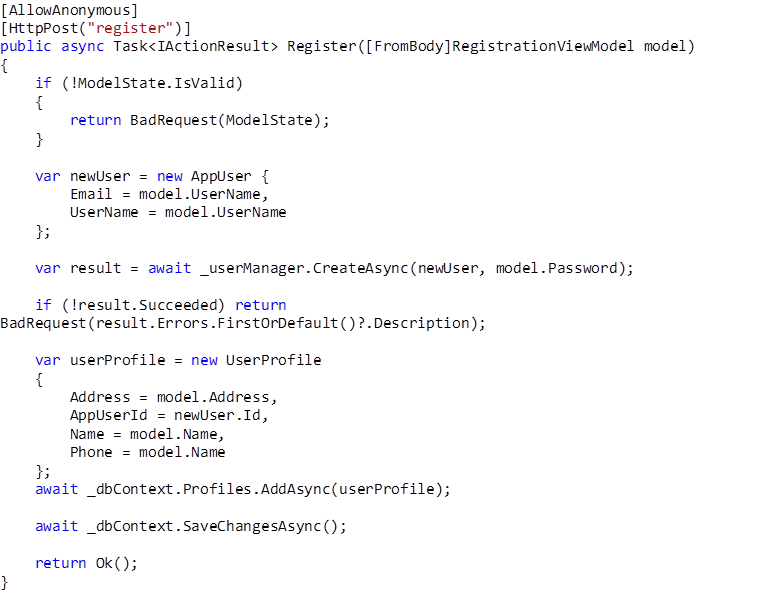
Now we are done with the register method, for simplicity we called a basic database operation using DBContext. Ensure this method is free from authorization. Otherwise, we will get a ‘401 Unauthorized http’ exception.
We can now register users so lets move on to authenticating them and issuing their identity tokens.
Validate User and Issuing JWT
And it all comes down to this section when implementing JWT, we will need to validate our user and then issue the JWT. We will do this in the AccountController, lets create a Login method to validate our user
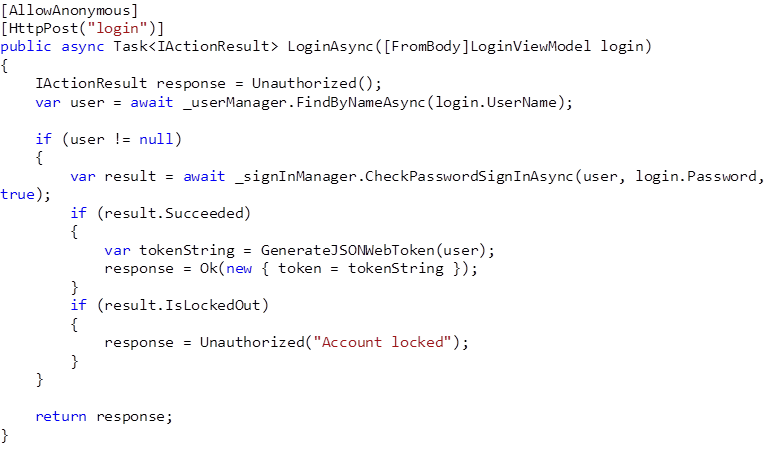
The logic is very simple because of the help ASP.NET Core Identity provides, we just needto check the password is correct and then generate the JWT. Upon success we can use the following method to generate the JWT.
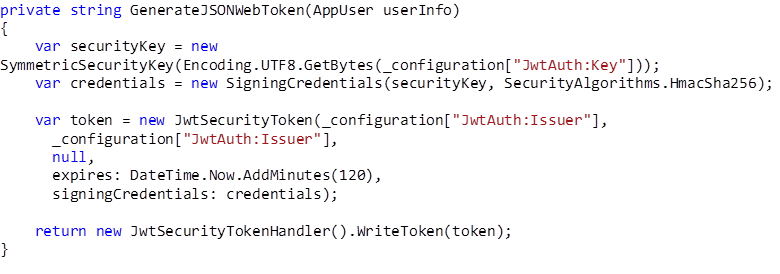
There arecouple of common algorithms for signing JWTs such as HMAC + SHA256(HmacSha256),RS256, or ES256. The simplest one is HmacSHA256 because it only uses a secretwithout any need of private and public keys. If you want to know more aboutthis signing algorithm, you can visit this reference: “Brute Forcing HS256 is Possible: TheImportance of Using Strong Keys in Signing JWTs”
Here wedefine the key that we need and the issuer to generate the token, along withthe use of HmacSha256 encryption for [SM11] [os12] the credential. It will give us a random token every time login requesthappens.
In this process the user just needs to send their username and password once, then a token is returned, after that the client side uses the token for every request. The token will be validated using the token and its expiry time to avoid hijacking used by an undesired person.
Usage and Testing of JWT Authentication
I will use Postman for testing, this tool will allow us to send and receive API requests with an easy intuative UI.
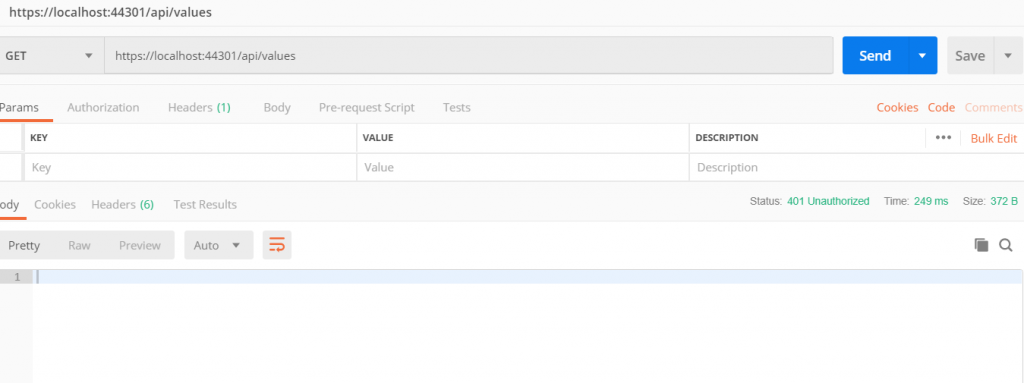
When creating the Web API project there is a ValueController class that is generated by default from the project template. Let’s use this controller for some testing] . We can decorate this controller with Authorize attribute and try to access it, it should return an Unauthorized HTTP code (401).
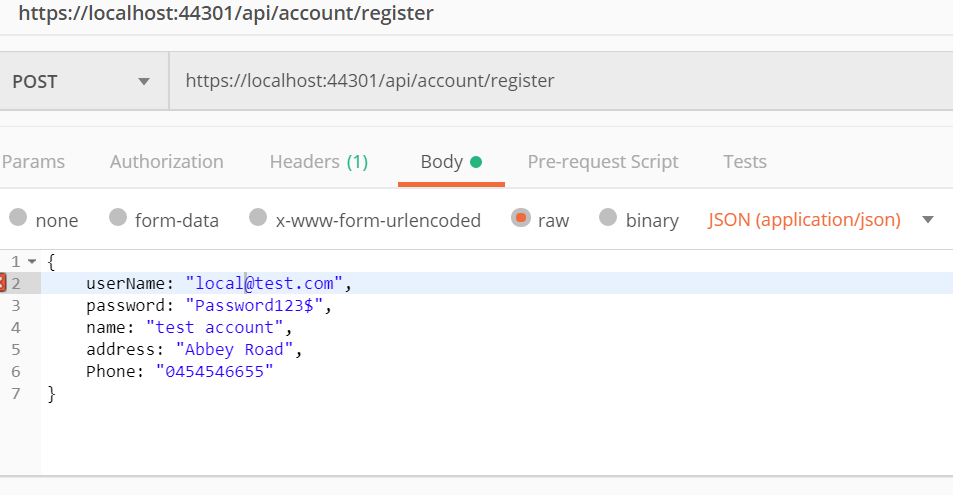
Now, we want to access it using a token from our implemented solution. First things first, we need to register a new user:
Then after the user has been created we can try to login.
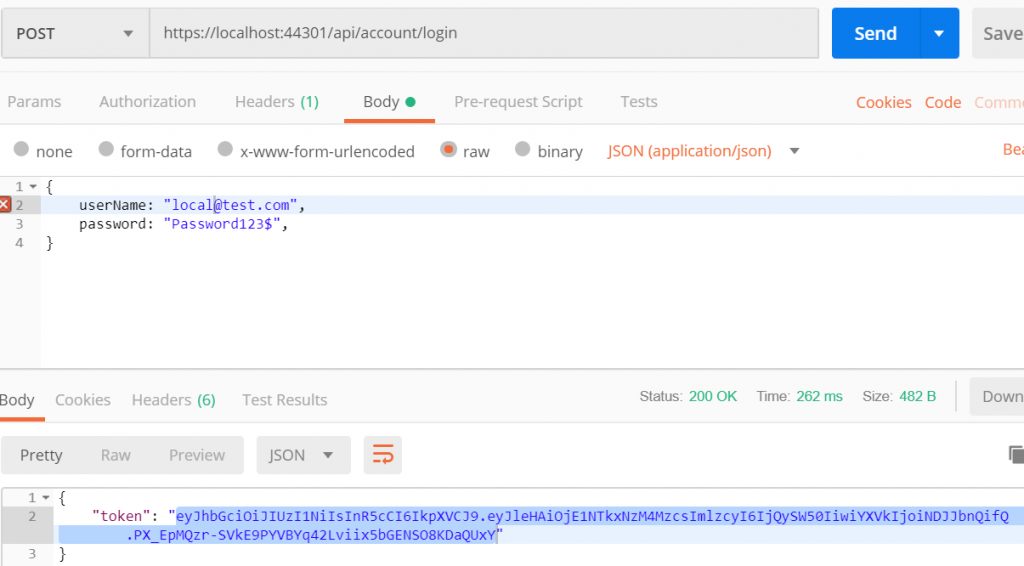
The login will return a token, and this token can be use to call the API endpoint in ValueController that previously returned 401-Unathorized. Lets call it again and define the Authorization Header the value is “bearer ” + the token we received
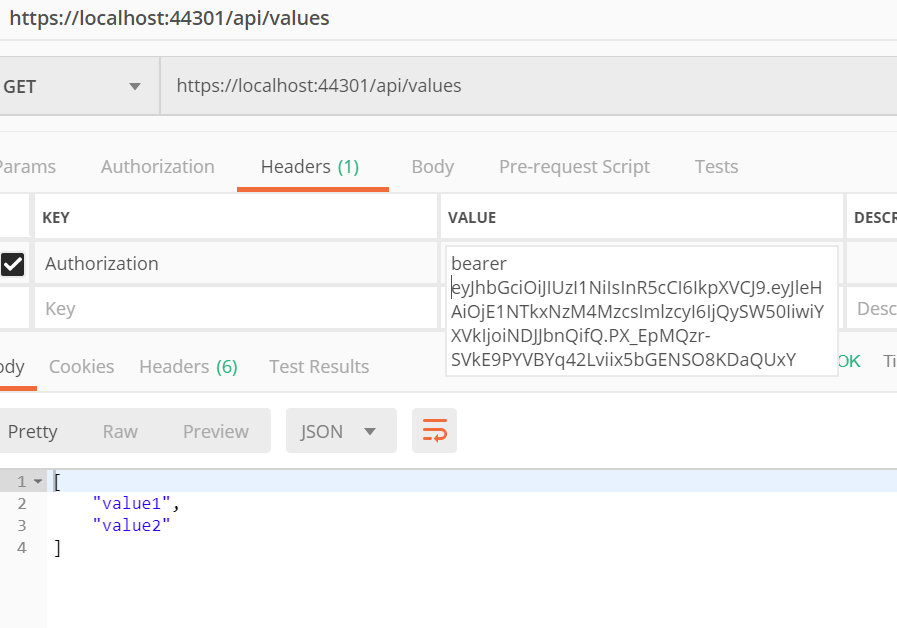
As you can see in the screenshot above, the API can be accessed now and that’s the end of our small beginning of JWT Authentication journey.[
Conclusion
A JWT Implementation in ASP.NET Core is a very straight forward and simple authentication method to implement. We can Integrate it with ASP.NET identity model without much difficulty. Using JWT we also avoid sending sensitive information like a password again and again.
So if we just need a simple Authentication paradigm when implementing SPA or a Mobile Application we can just use JWT Authentication. It will save time because its less complex than other methods and it’s readily available by .net core.
What’s Next
In this article, we created a simple authorization process to secure our API. This method needs the user to be Authenticated, but very often we will need to do more complex Authorization the API can only be accessed if the user is manager, or the API can only be accessed if the age of a user is more than 18. We can use Claim based authorization for these use cases by storing this information in a certain section of the token then call on it later. For more information about claim and how to use it, please visit this reference.


