
Building a Voice Assistant Mobile App with React Native and ChatGPT Integration
April 16, 2024
During the training process, one of Developers penned this article, taking advantage of the services offered by 42 Interactive.
In this article, he will explore how to use Reach Native and integrate ChatGPT to build a smart voice-driven, app. The audience will learn how to start a project and make interactive voice features, combining Reach Native’s strengths with ChatGPT’s language abilities.
What is A Voice Assistant?
A voice assistant is a digital assistant that uses speech recognition, natural language processing, and artificial intelligence (AI) to understand and respond to spoken commands or queries. These assistants are designed to perform various tasks and provide information based on user input.
Voice assistants can be found in various devices, including smartphones, smart speakers, smart TVs, and other internet-connected devices. Some well-known examples of voice assistants include: Amazon Alexa, Apple Siri, Google Assistant, Microsoft Cortana, Samsung Bixby.
Voice assistants have become increasingly popular due to advancements in natural language processing and the widespread adoption of smart devices.
What is ChatGPT?
ChatGPT is a language model developed by OpenAI, based on the GPT (Generative Pre-trained Transformer) architecture. The “Chat” in ChatGPT signifies its focus on generating human-like text for conversational purposes. It is designed to understand and generate coherent responses in natural language, making it suitable for chat-based applications.
ChatGPT was created by OpenAI an artificial intelligence (AI) research organisation that aims to advance digital intelligence in a safe and beneficial manner. It was founded in December 2015 by Elon Musk, Sam Altman, Greg Brockman, Ilya Sutskever, John Schulman, and Wojciech Zaremba, among others. OpenAI’s mission is to ensure that artificial general intelligence (AGI) benefits all of humanity.
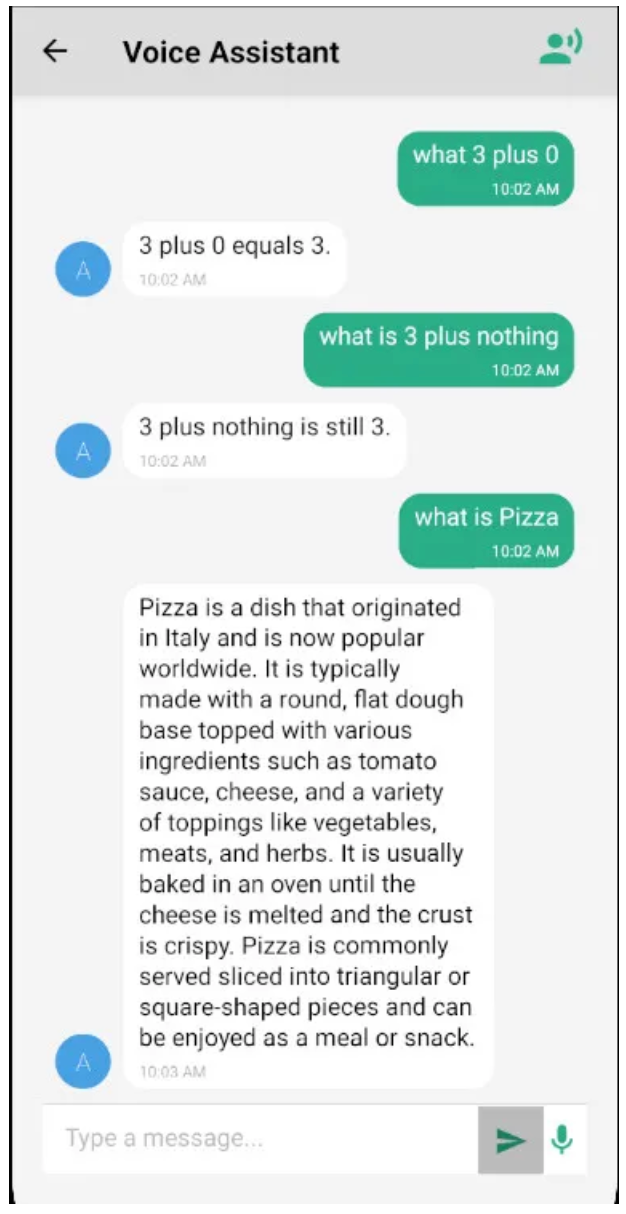
The application will look like below:
Prerequisites:
- Node.js and npm: Ensure that Node.js and npm are installed on your machine.
- Text Editor: Choose a text editor of your preference; Visual Studio Code is recommended.
- OpenAI API Key: Obtain your OpenAI API key by signing up at https://openai.com.
Create a New React Native Project
Start by initiating a fresh React Native project with the provided commands:

Once finished, proceed to run the project using the following commands:

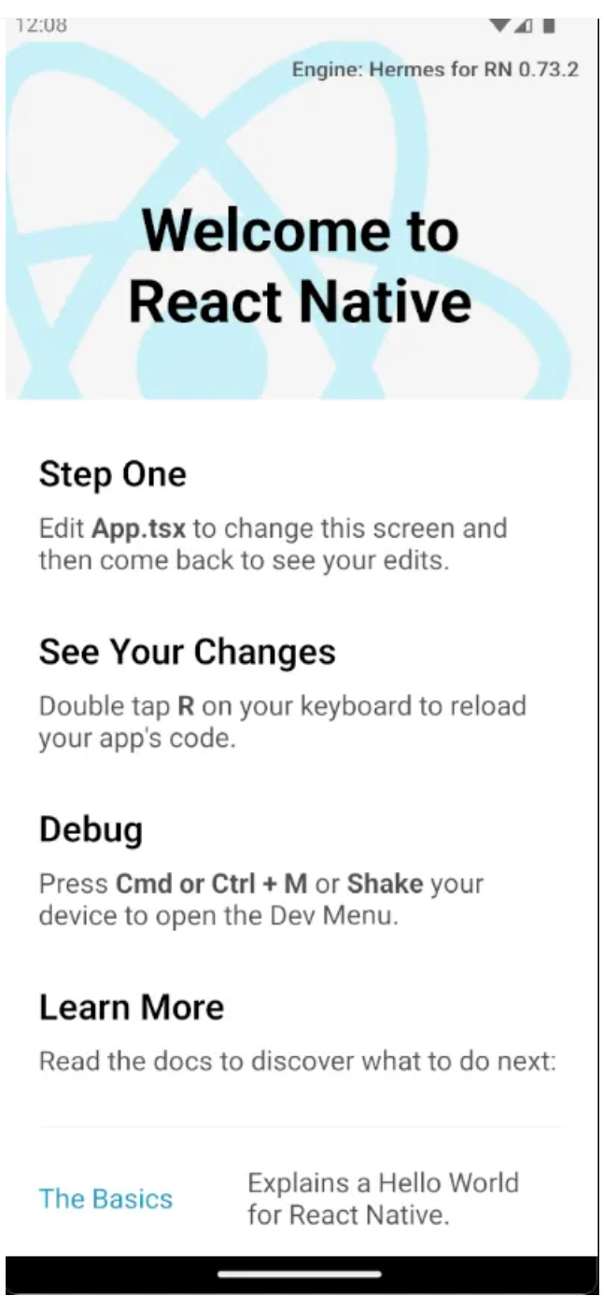
It will display a default screen as shown below:
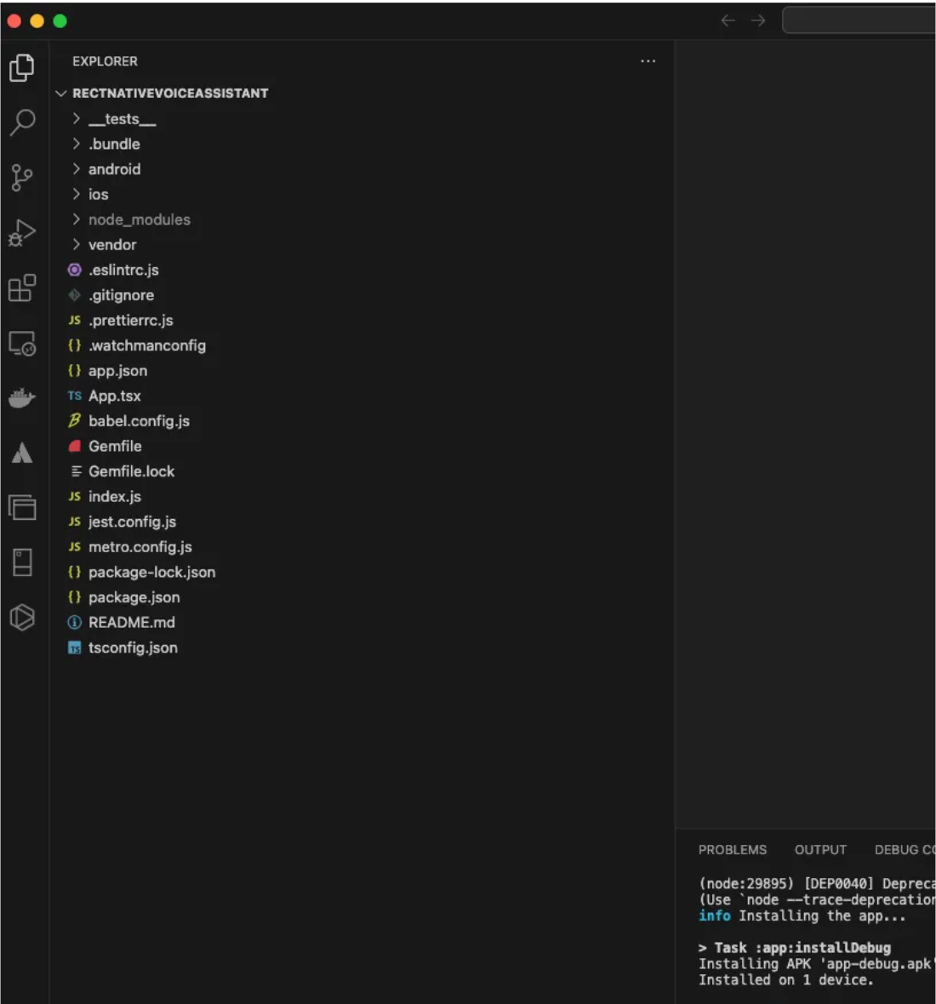
Open Project with Visual Studio Code
Open the project with Visual Studio Code. Here we can see some files and folders that were automatically generated from the previous step.
Installing Dependencies
Dependencies are external libraries or packages that enhance the functionality of your application, providing pre-built solutions for common tasks.
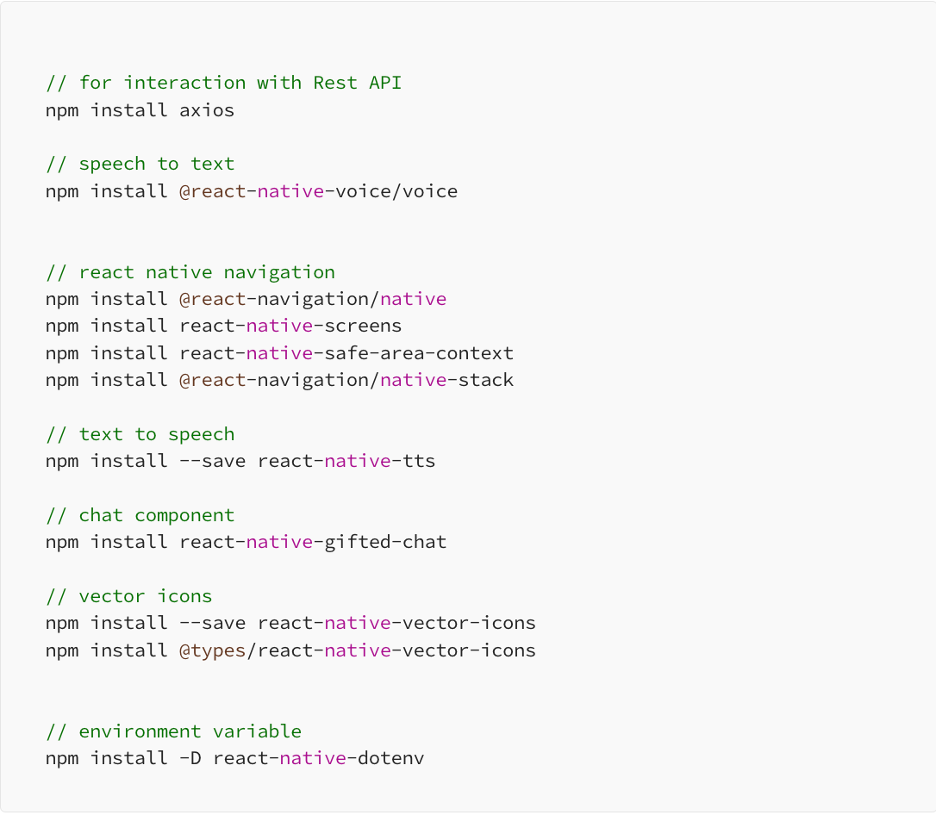
I won’t delve into the specifics of each library mentioned above here. For documentation, you can visit their respective official websites.
Implementing Voice Assistant
Creating Additional Folder
Let’s create some folders: src/screens, src/navigations, src/services, src/styles, src/store, src/utils, and src/components to better organise our code. In the screens folder, we will place all code related to the screen, the navigations folder for code related to navigation, services for code related to accessing the rest API for OpenAI, styles for stylesheets, and store for Redux state management.
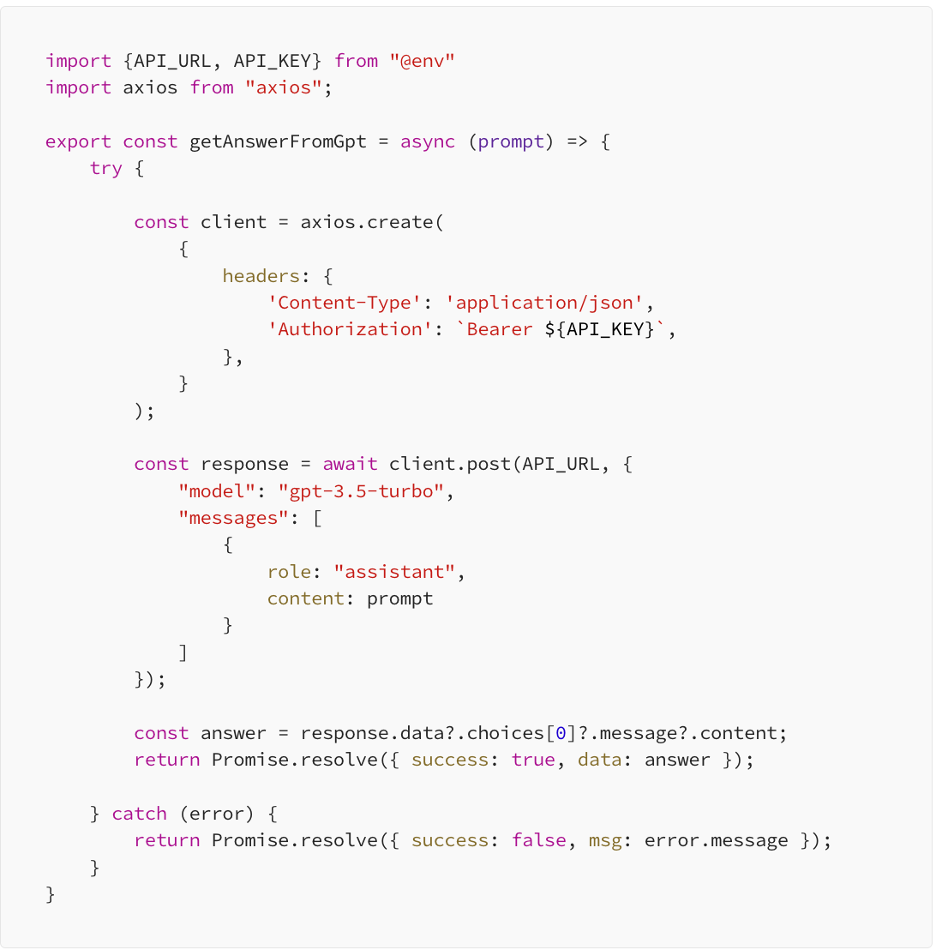
Creating Service for Accessing the ChatGPT REST API
Creating this service is a fundamental step in enabling seamless communication with the ChatGPT API, allowing your tutorial mobile app to leverage the power of ChatGPT for an interactive and dynamic conversational experience.
First, let’s create a file named env. Inside it, there should be a constant for accessing OpenAI. Yes, it should be without single or double quotes. Please remember not to publish your API key.

Create the file src/services/OpenAiService.js. The code will read a variable from the .env file and use Axios to call the API, returning the response from OpenAI. If an error occurs, it will return an error message.
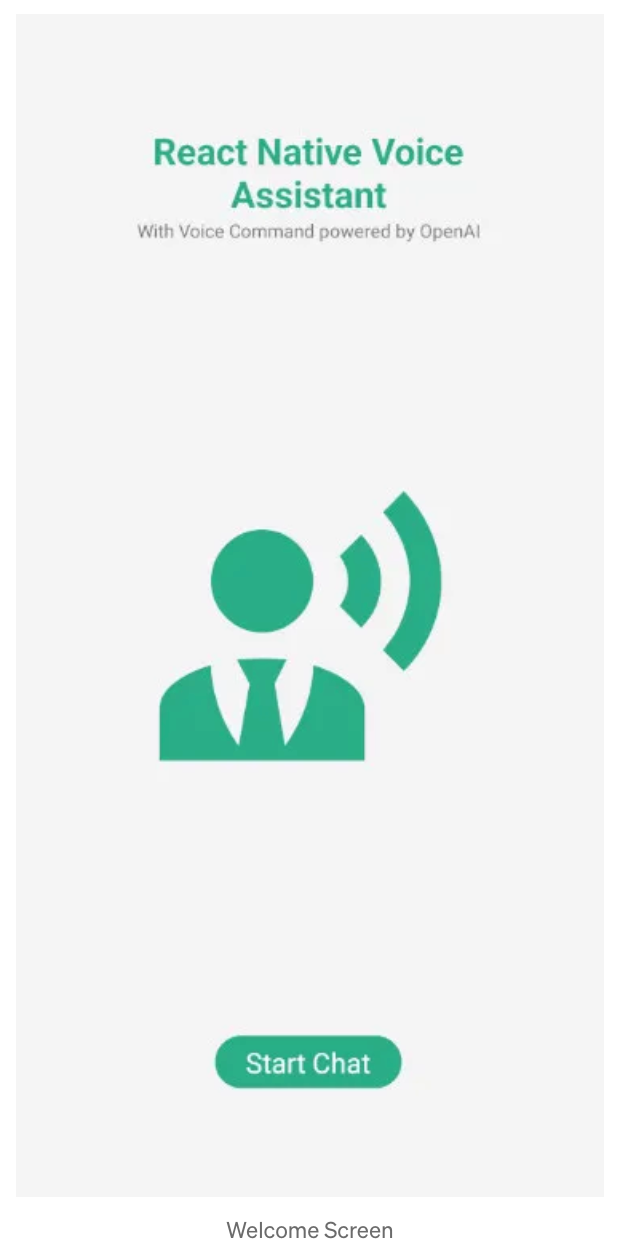
Creating a Welcome Screen
Creating a welcome screen in a mobile app involves designing a screen that serves as the initial interface for users when they launch your app. Welcome screens typically provide a warm introduction, branding, and often include features like onboarding or sign-in options. Below is the welcome screen he will create.
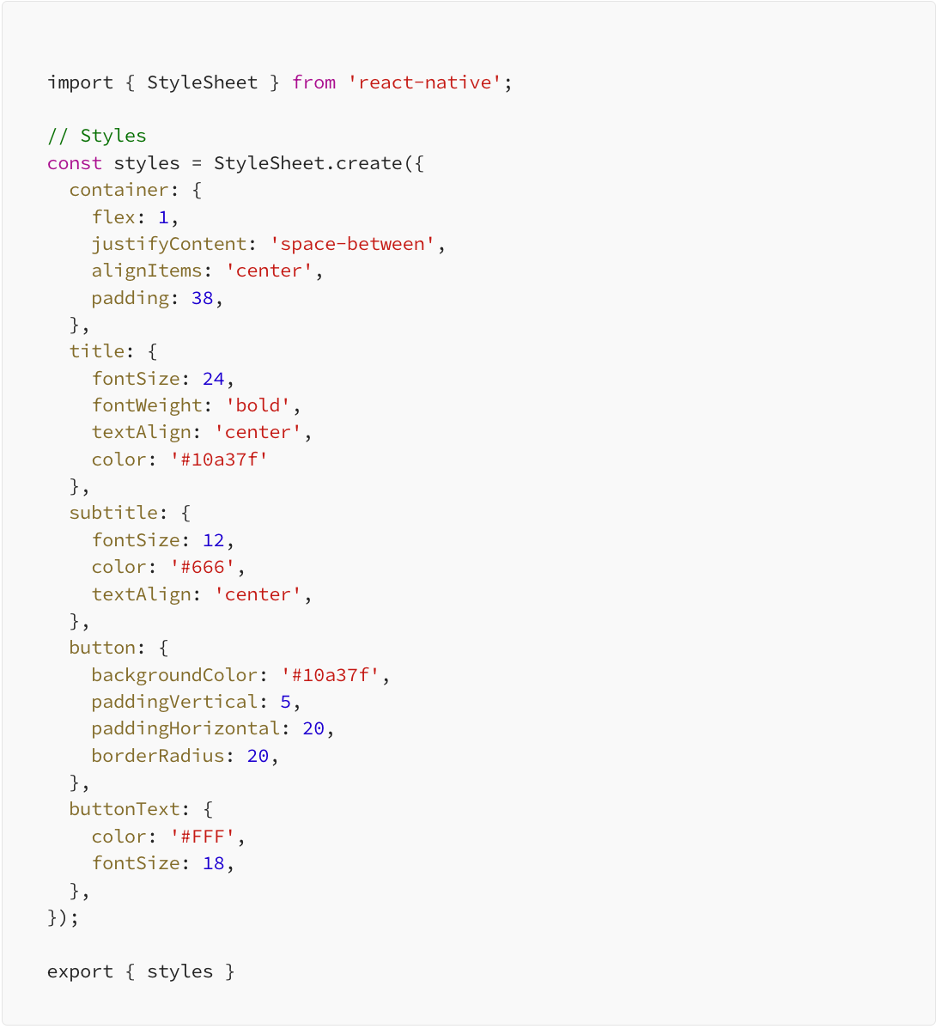
Lets create file on folder src/screens with filename WelcomeScreen.tsx use this code:
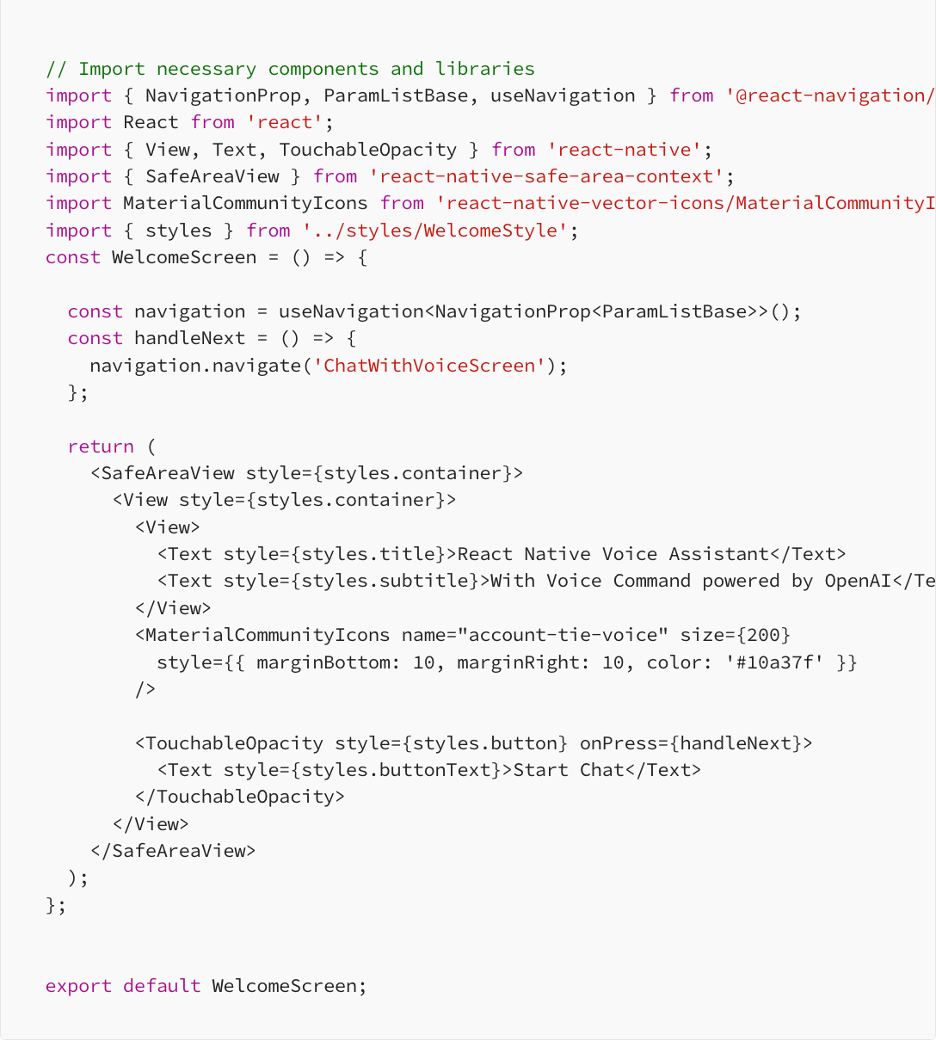
In the code snippet above, you can observe our utilisation of Navigation, Stylesheet, and MaterialCommunity icons as components of the Vector Icon.
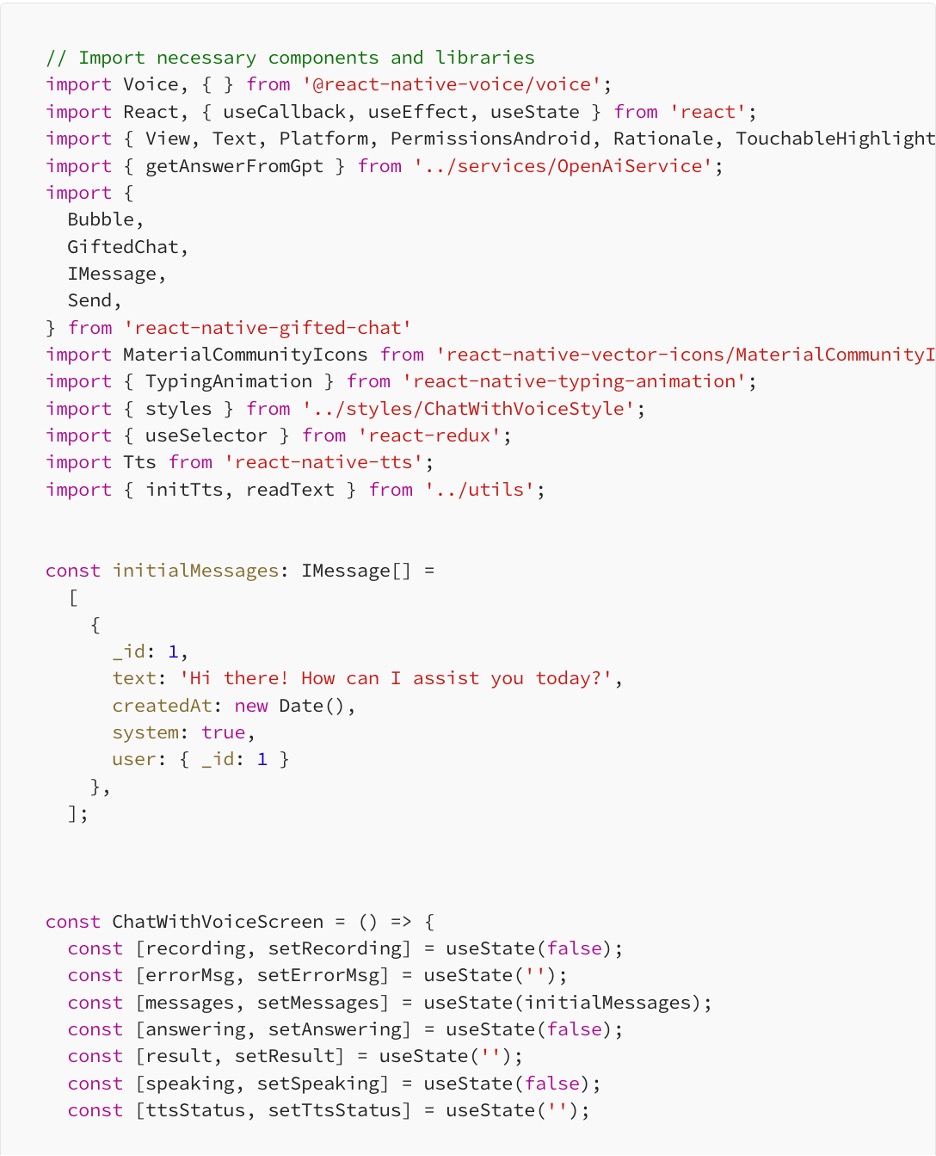
Creating a Voice Assistant Screen
Now, we are creating a screen for our voice assistant application, located in the src/screens folder with the filename ChatWithVoiceScreen.tsx. This screen will manage voice recognition, converting spoken words to text, facilitating chat typing, activating voice settings, and, of course, presenting response results from ChatGPT. Additionally, it will include text-to-speech functionality to transform written text into spoken words. Please look at red dot, it all features of our screen.
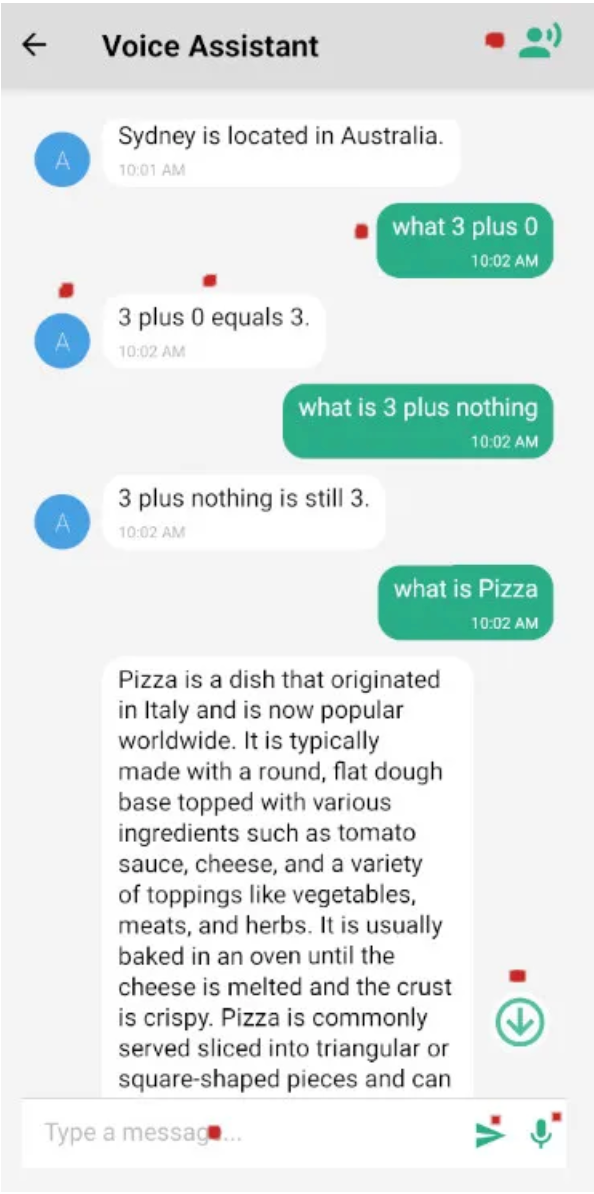
This screen is organised into seven main sections, each serving a specific function. Starting from the top:
- User Chat: Input from either typing or voice command.
- ChatGPT Responses: Displayed with corresponding avatars.
- Scroll-down Icon: Allows scrolling to the latest response.
- Typing Input: Field for entering text.
- Send Button: Initiates the sending of messages.
- Voice Command Button: Press to start recording voice commands, and press again to stop recording.
Here are parts of the code:
Creating a Navigation
Lets create file AppNavigation.tsx on folder src/navigations.
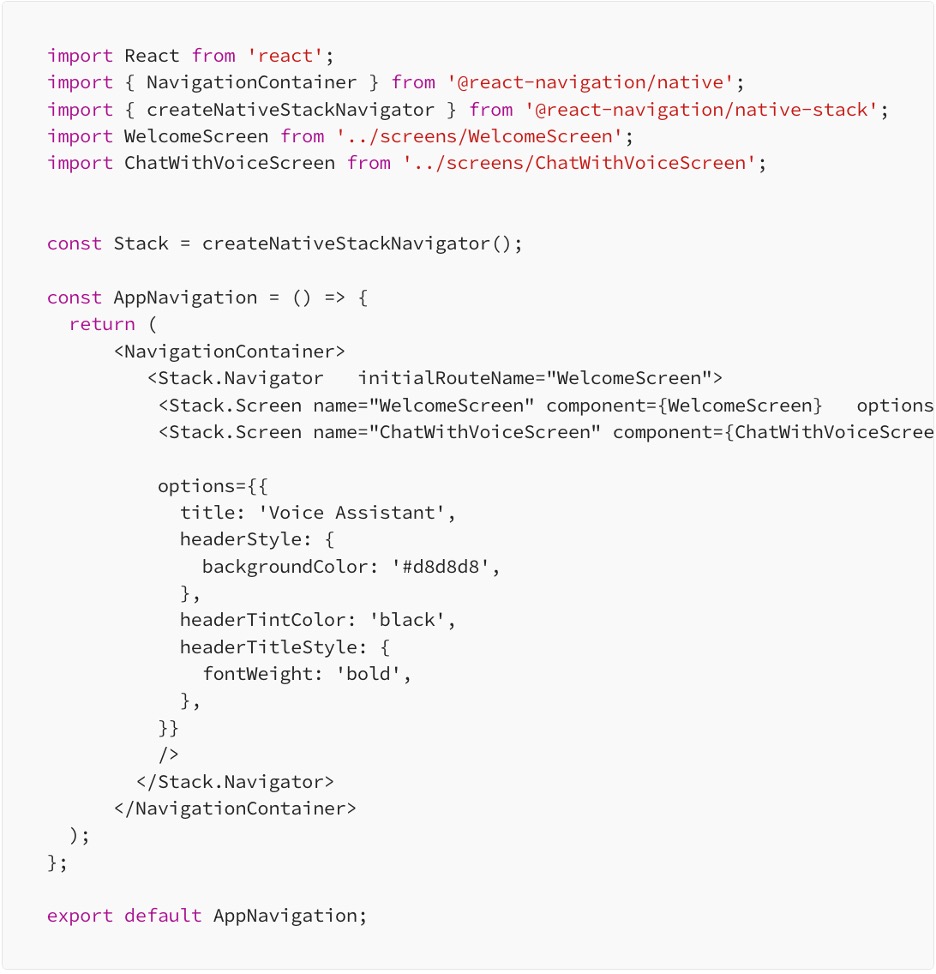
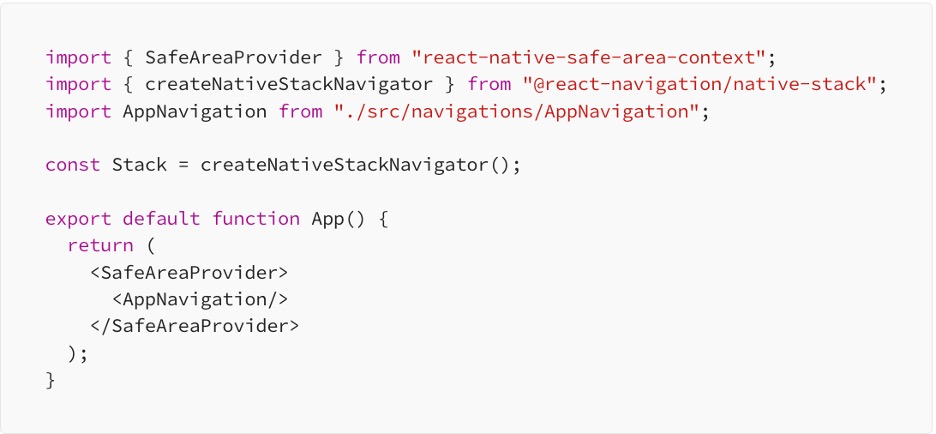
Next, we will integrate navigation into our application by modifying the App.tsx file to include the AppNavigation component.
Run Your React Native App
To set up your environment, run, and build a React Native project, you can follow the instructions outlined in the React Native Get Started guide.
run Android:

run iOS:

You can watch the demo below:
Conclusion
By building an advanced voice assistant with React Native and the ChatGPT API, users can easily engage with the app through voice commands, while the system effectively transcribes and analyses spoken words using OpenAI’s sophisticated language models. This tutorial serves as a foundation for developing voice-controlled applications, seamlessly integrating them with OpenAI’s potent natural language processing capabilities.
The audiences are encouraged to customise and expand the app to suit your requirements, adding new features, refining the user interface, and improving error handling for a more seamless user experience. With ample room for customisation, unleash your creativity to elevate the functionality and appeal of your voice assistant application.
Are you ready to make your customer service up a notch with AI? We can help. Contact us now.
Written by:
Putu Kusuma [Fullstack developer at 42 Interactive]
- As a part of 42 Interactive training and research programme -


